Check your network connection - Windows XP
To check the status of your local area connection, follow the steps below.
-
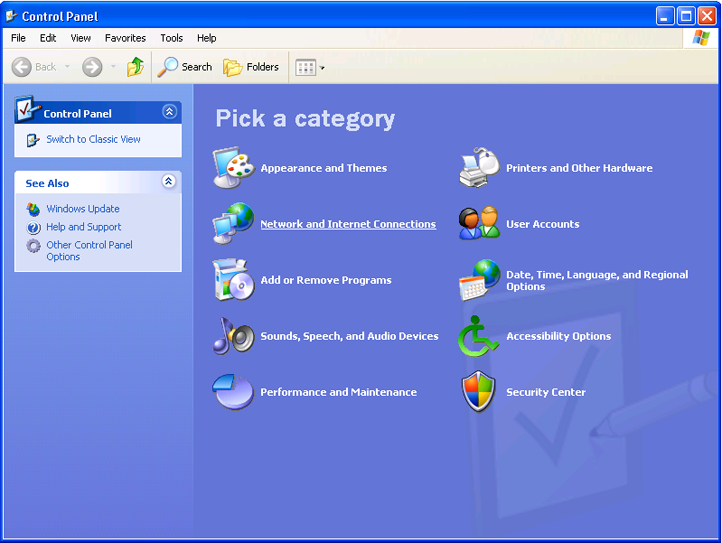
From your desktop, click on Start and select Control Panel.
-
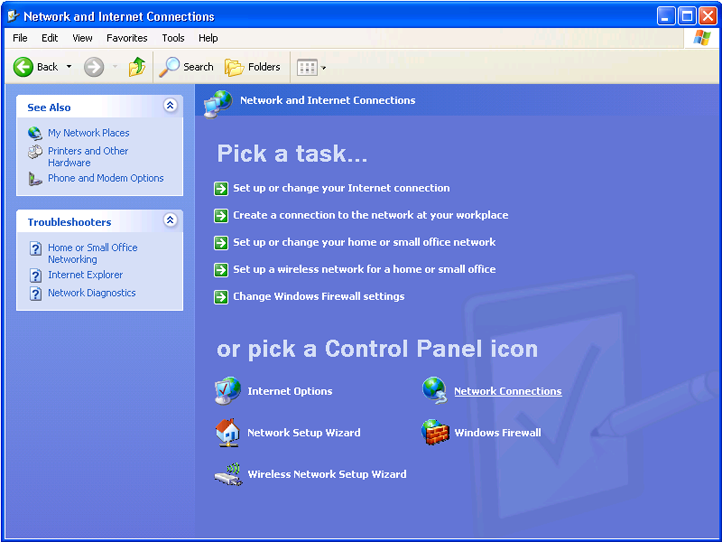
From the Control Panel window, select Network and Internet Connections.
-
Select Network Connections.
-
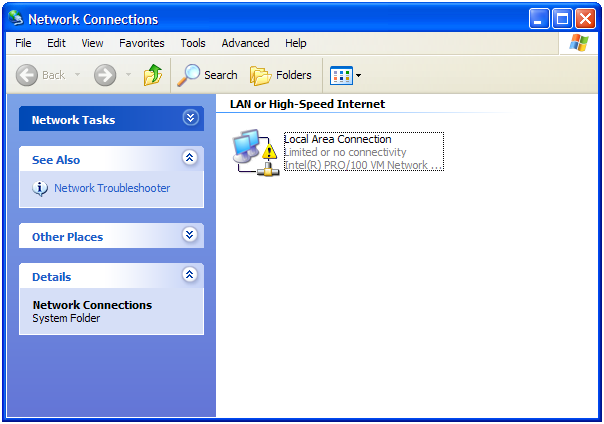
In the Network Connections window, look for the Local Area Connection icon.
-
If the Local Area Connection icon has a yellow triangle with an exclamation mark (!), continue to step 6 to change your IP settings to a manual configuration.
If the Local Area Connection icon does not have a red cross or a yellow triangle, but you are still experiencing connection problems, check your web browser's connection settings.
-
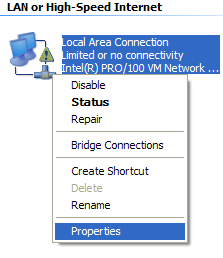
To manually configure your IP settings, right-click on the Local Area Connection icon, then click on Properties at the bottom of the menu.
-
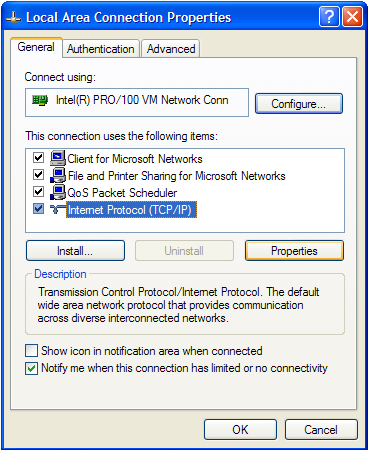
In the Local Area Connection Properties window, scroll down in the window 'This connection uses the following items' until you see Internet Protocol (TCP/IP) - click this once, then select Properties.
-
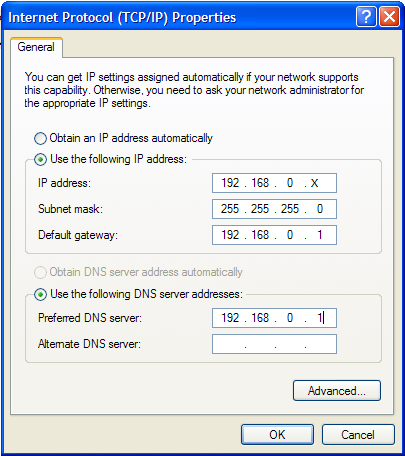
In the Internet Protocol (TCP/IP) window:
- Select Use the following IP address
- Set the IP address to: 192.168.0.X (where X must be a number of your choice between 2 and 254 and should be unique for each PC connecting to the Sky wireless router)
- Set the Subnet mask to 255.255.255.0
- Set the Default gateway as 192.168.0.1
- Select Use the following DNS server addresses
- Set the Preferred DNS server to 192.168.0.1
- Leave the Alternate DNS server blank
- Once completed, the details should look similar to the image below. Click OK
-
Click OK again in the Local Area Connection Properties window.
-
Restart your computer and open a web browser to check if you can now browse the web using your broadband service.